

Why My Head Hurts: The ‘Sandwich Mortise Method’
Why My Head Hurts: The ‘Sandwich Mortise Method’


About two years ago, Rudy Everts made a suggestion about drilling mortises in chairs that has haunted me.
Rudy is a chairmaking genius currently slumming as an artistic genius. So when Rudy comes up with an idea, I listen. Here was the suggestion: Clamp the chair’s arm to the seat and drill the mortises for the sticks while the two are clamped together. No drilling jigs.
Rudy had experimented with it, and it worked. I immediately gave it a try with one of my Gibson chairs. Basically I drilled the mortises for the rear posts through the arm and seat while they were clamped together.
It worked. But figuring out how to do all the mortises in a chair in one go eluded me until Friday morning.
I’m building a chair for “The American Peasant.” The book is written, edited and designed. (Tomorrow, paid subscribers will be able to download the whole thing – minus the chair chapter – from behind the paywall). But we still need some beauty shots of the finished furniture, and that has been a scheduling problem. So I am gladly spending this slack time tinkering with the book.
This particular chair has been in my head for almost five years, ever since Lucy and I spent a week photographing and measuring chairs in Ireland. One chair at the Irish Agricultural Museum caught my eye, and it has been bouncing across my corpus callosum since.
I wish I could show you the antique chair, but I don’t have a photo of it. I didn’t post it on our blog after my visit. And I lost all images of it in the Great Dropbox Fire of 2022.
That’s enough run-up to the technique. Any more, and y’all will start think this is a recipe you found on the internet (My Sicilian grandmother loved two things: potatoes and a sense of boundless ennui…).
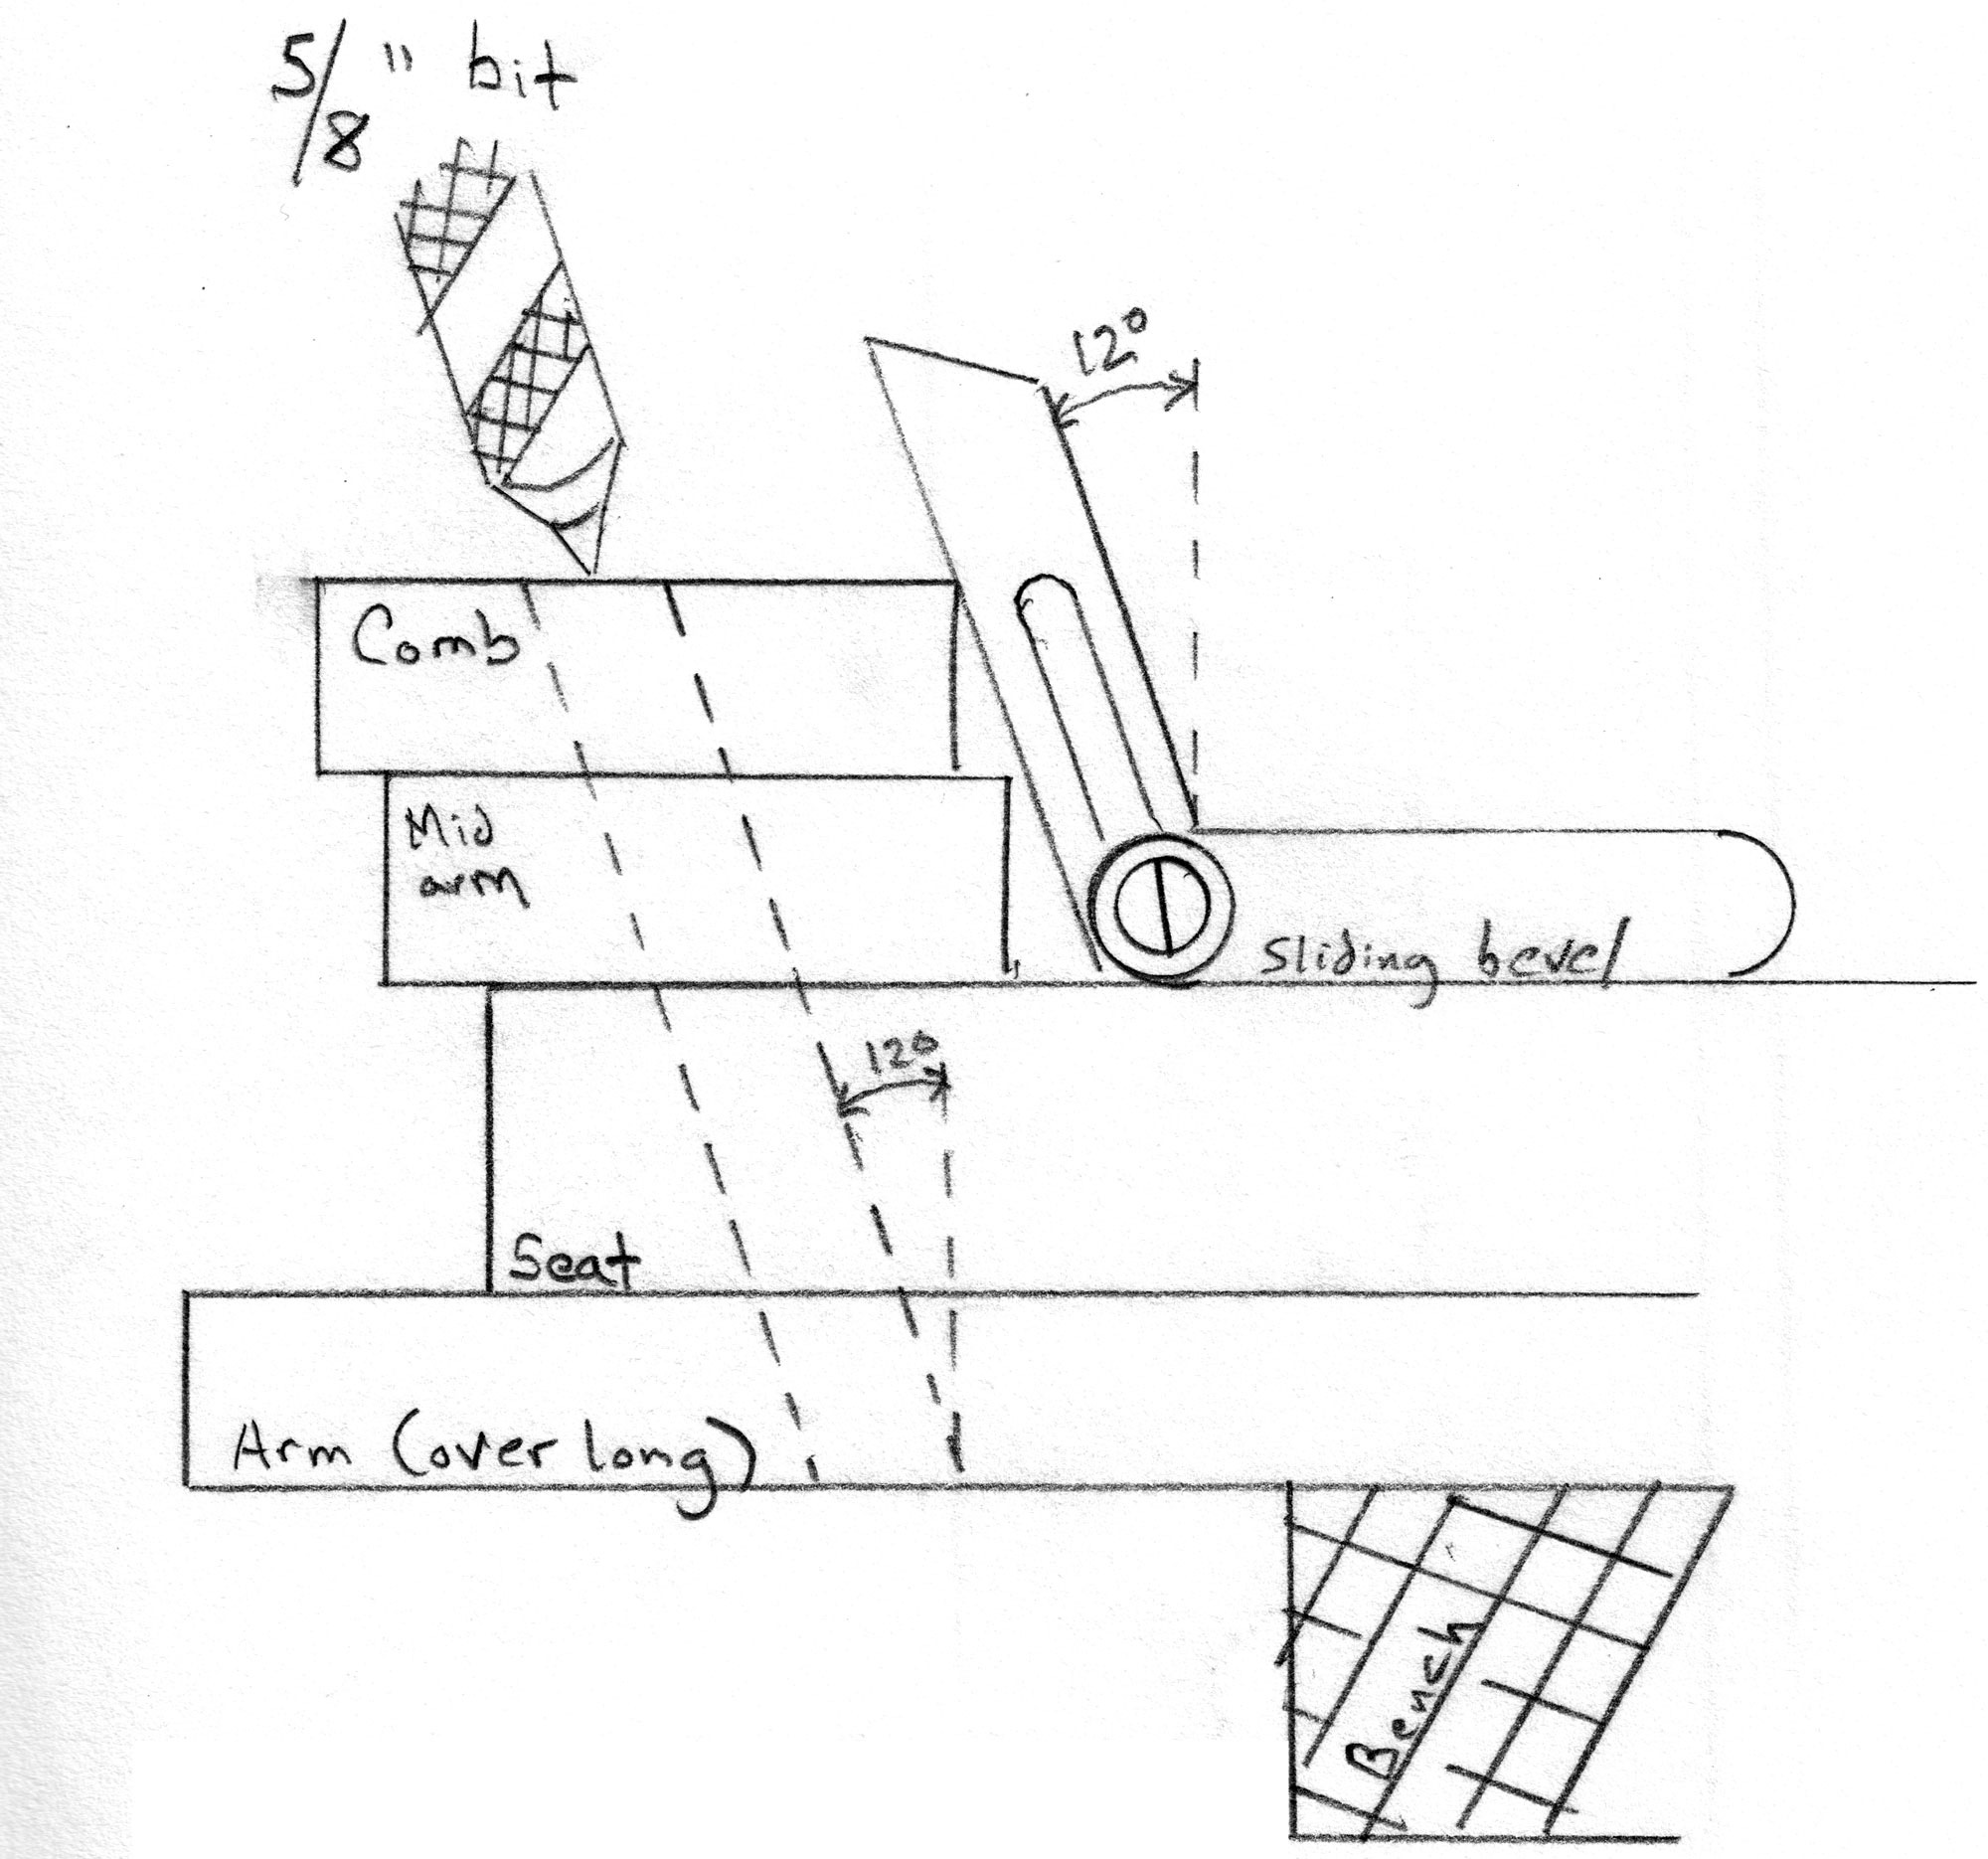
Caveat: This technique doesn’t work with all chair designs, especially ones with extreme angles. But it works with a lot of chairs. For this simple example, we’ll use a mid-arm, arm and comb that are all the same width (2" wide in this case).
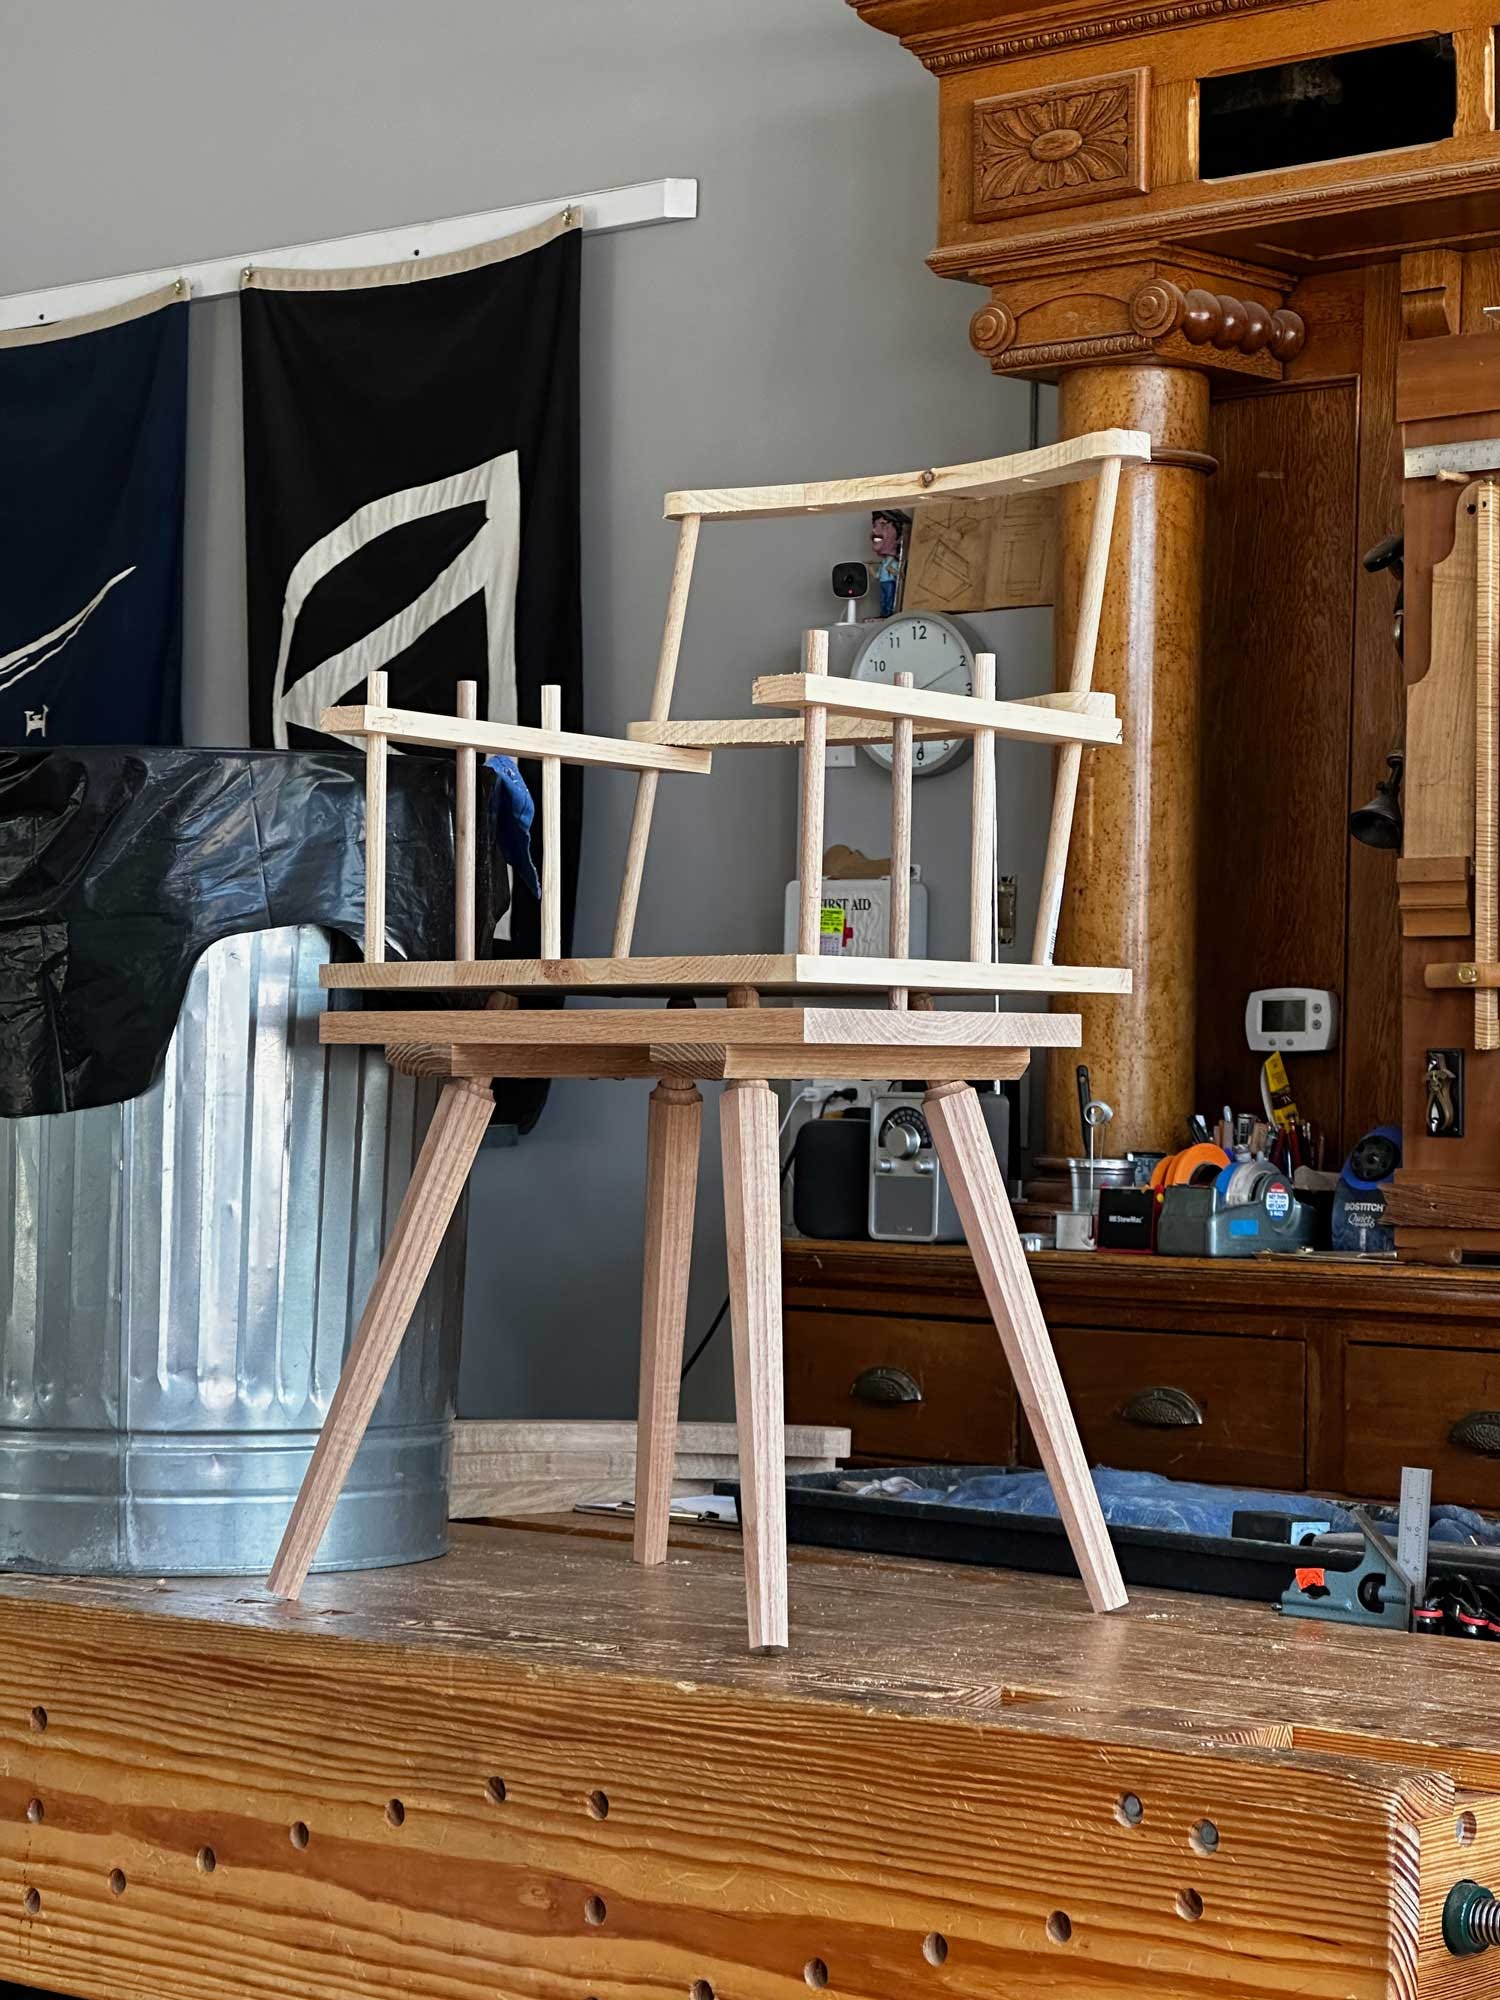
Step 1: Stack the parts for drilling.
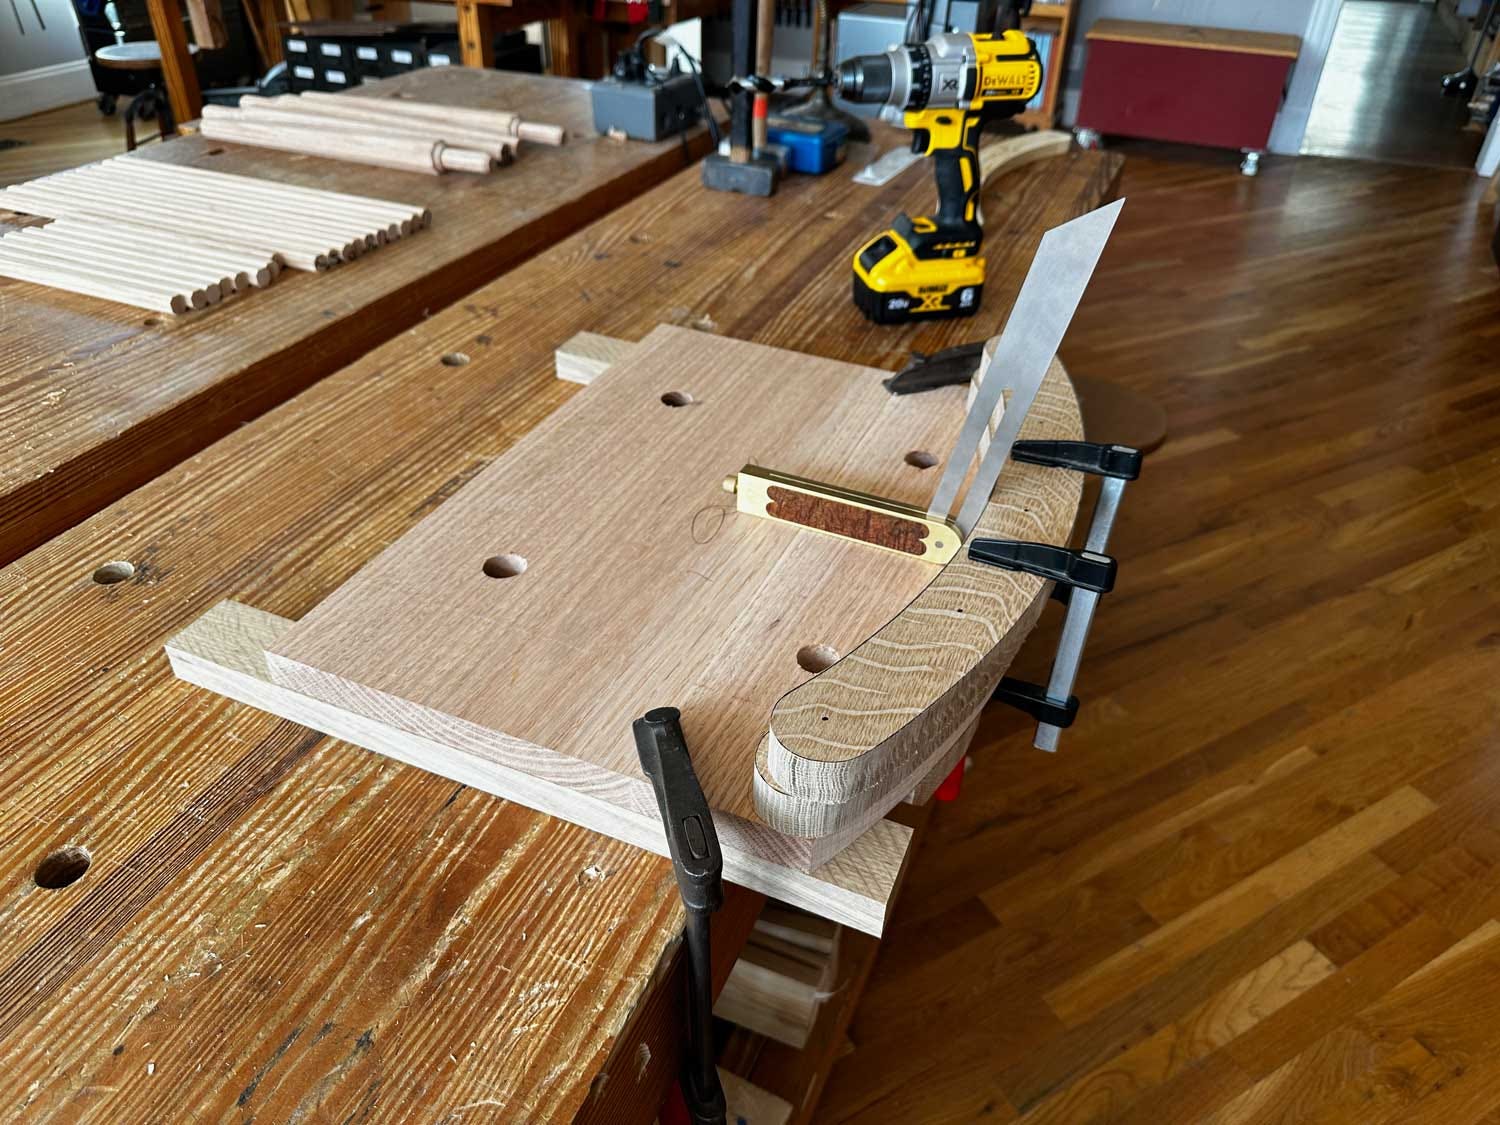
Put the seat on the workbench. Put the mid-arm (or doubler or whatever you call it) on the seat with its rear edge flush to the rear edge of the seat. Trace the shape of the mid-arm onto the seat in pencil. Place the comb on top of the mid-arm. Flush them up.
Set your sliding bevel to the desired back tilt (12° in this case). Place the sliding bevel on the seat. Put the blade so it is on the pencil line you traced for the front edge of the mid-arm. The blade should push the mid-arm and comb back a bit. Flush up the mid-arm and comb to the bevel of the sliding bevel. Check the angle at a few locations on the stack of parts.
Clamp the arms below the seat, flush to the outside edges of the seat. The arms are over-long, so their exact position forward and back isn’t critical. Just get them flush to the left and right edges of the seat.
Clamp the stack of parts to the seat. Then clamp the seat to your workbench with the back of the seat hanging off your workbench (this is so you don’t drill into your bench).
Keep reading with a 7-day free trial
Subscribe to The American Peasant to keep reading this post and get 7 days of free access to the full post archives.