

Final Assembly of the Hobbit Chair
Final Assembly of the Hobbit Chair
Part 8 (the final post) of the chair-building series.

We are almost done with this chair. We just have to finish assembling the top part then apply a finish. So let’s get it done.
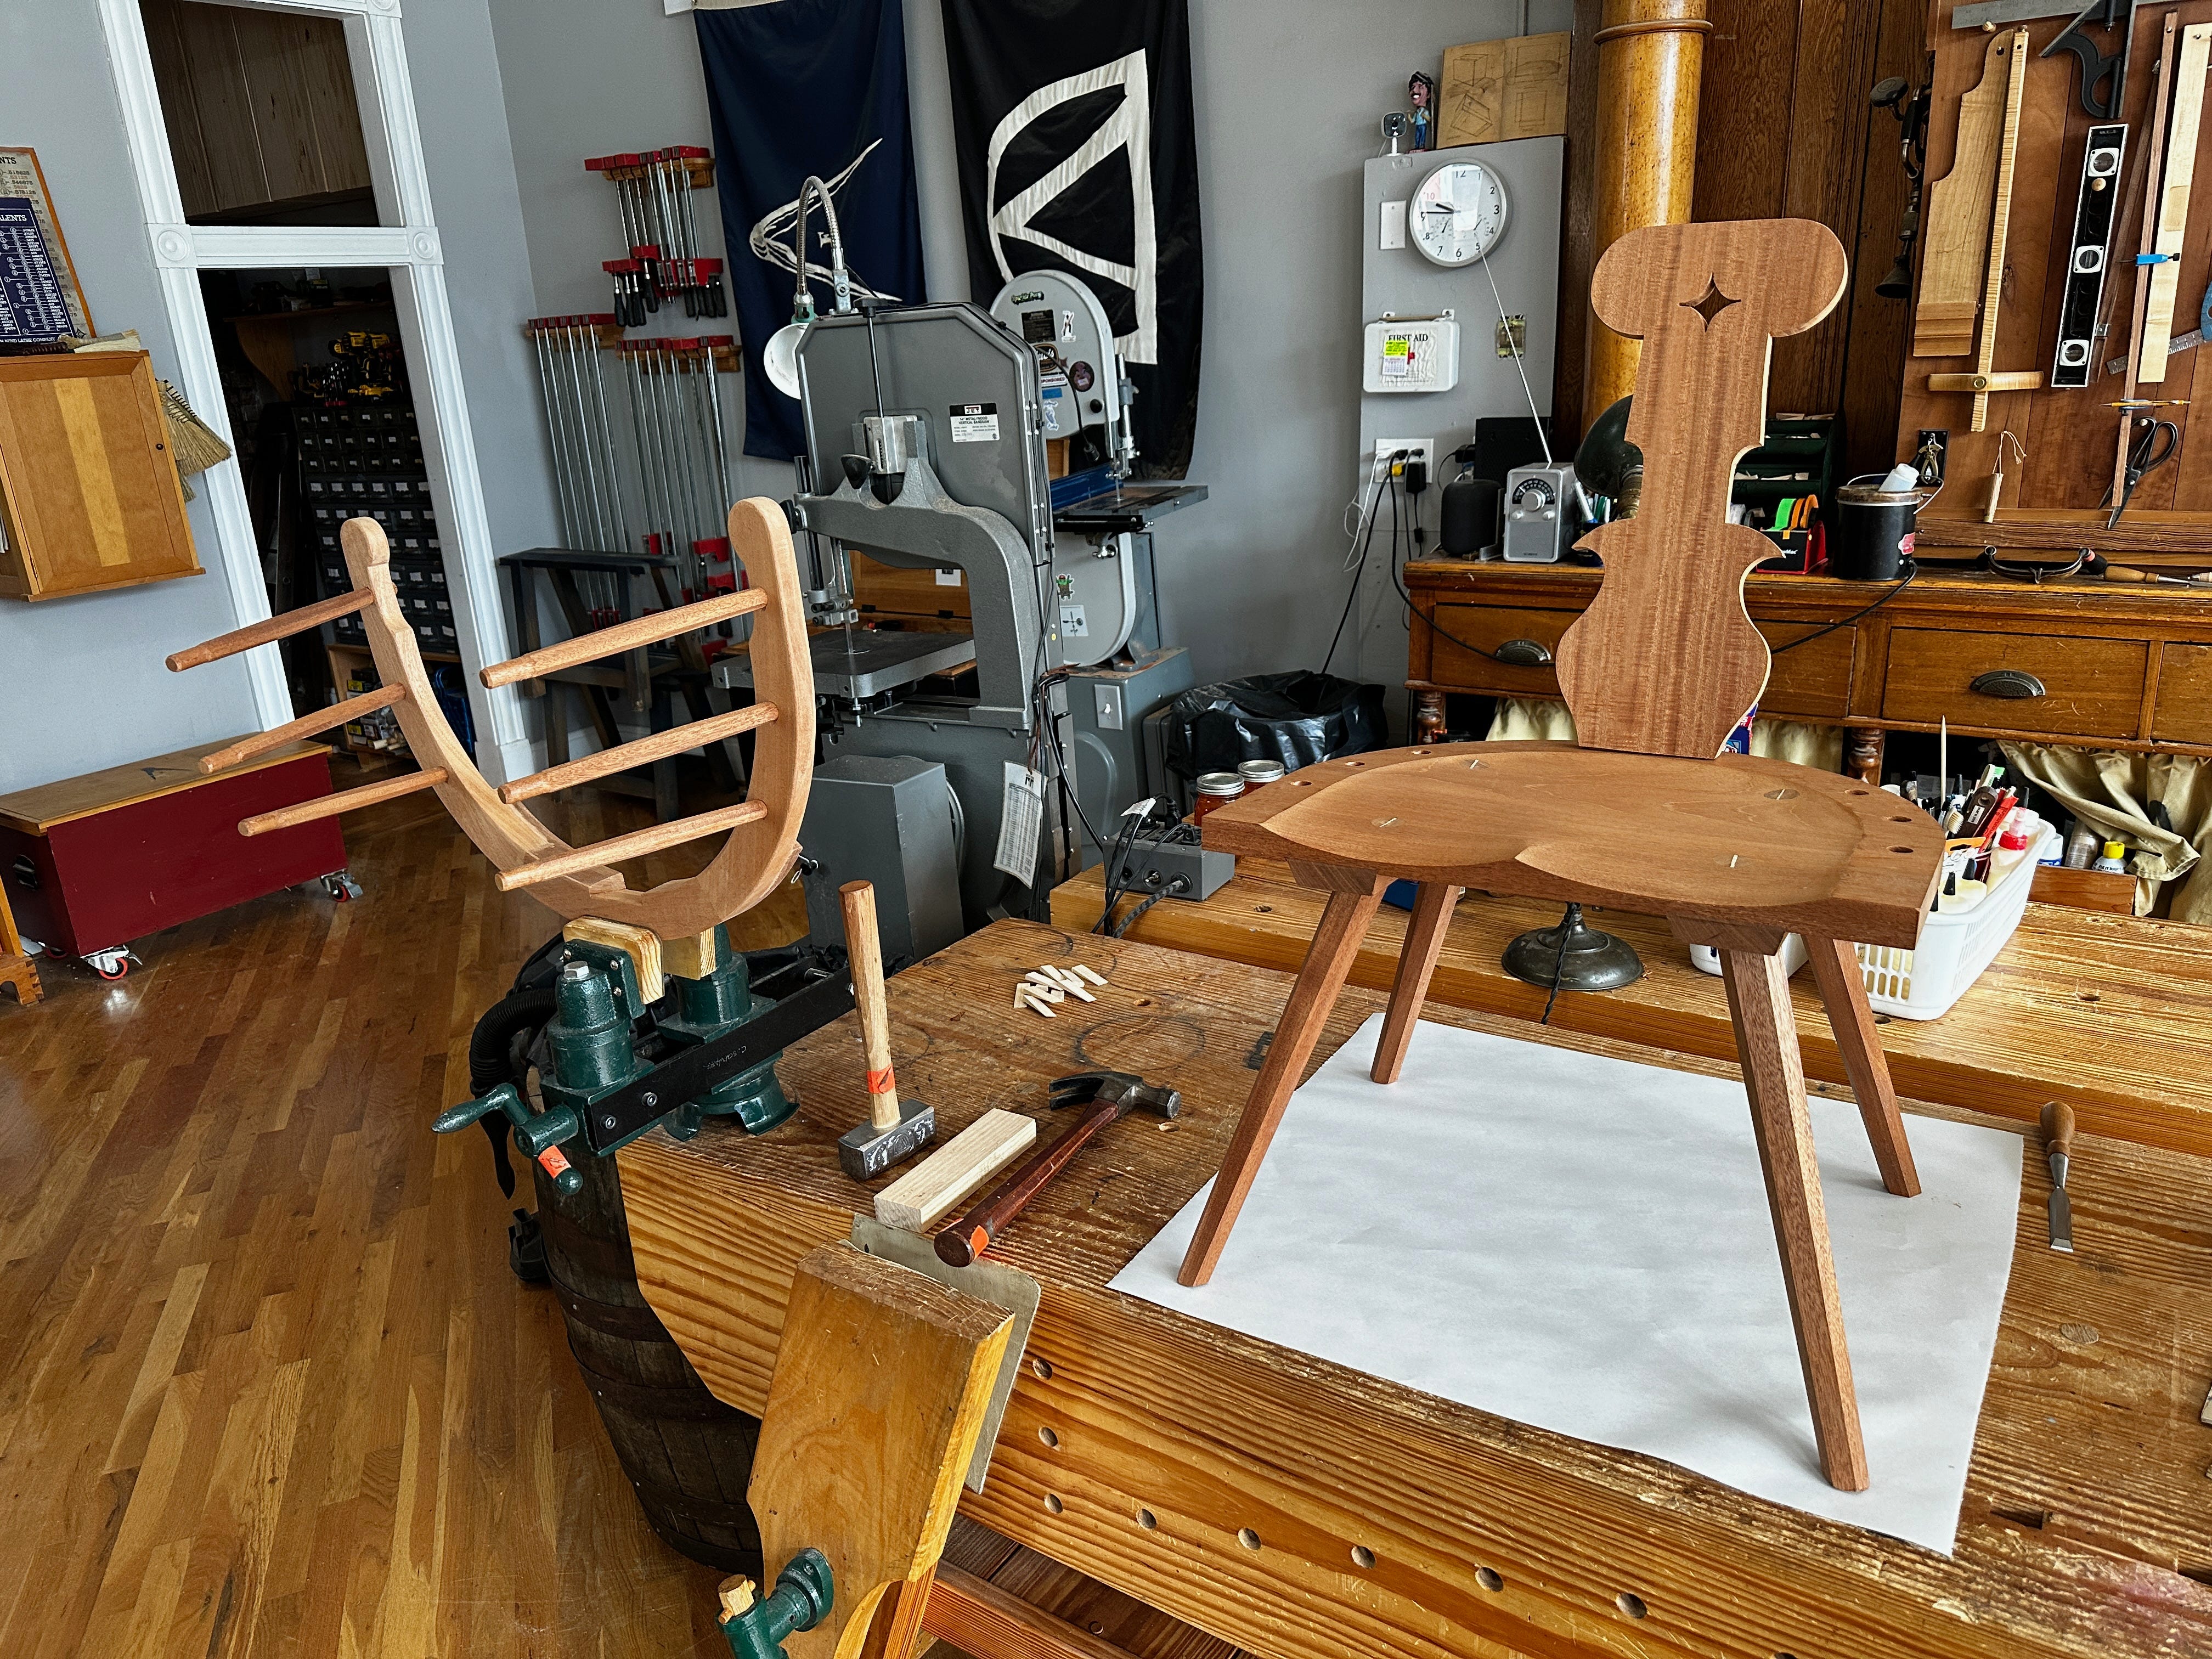
The photo above shows how I prepare to assemble these chairs. The backsplat is glued into the seat. The sticks are dry-fit into the arm. And the arm is grasped by my carver’s vise. Here are the tools on my bench:
Lump hammer and scrap of wood (for knocking the arm in place)
12 ash wedges (always have twice as many wedges as there are tenons)
Torrington glue brush
5/8" chisel to open up a tenon’s kerf if need be
16 oz. nail hammer (to drive wedges)
Clean rags
Hot water
Toothbrush (for cleaning up glue)
Cup for the glue
Tape measure (to gauge if the arm is in the right place)
Begin by gluing the backsplat in the seat. Paint glue on the mortise and drive the backsplat in place.


Paint glue into all the mortises in the seat. Now pull the sticks out of the arm, one by one. Paint glue in the mortise in the arm, paint a thin coat on the tenon. Put the stick in the arm and rotate it so its kerf is perpendicular to the grain of the arm. Repeat for the other five sticks.
Paint glue in the notch in the arm.


Release the arm from the vise. Put the arm’s notch on the backsplat and navigate the sticks to their mortises. Once you get the sticks started, knock the arm in place using the lump hammer (protect the arm with the scrap of wood). The arm should end up 8" off the seat all around.
Glue and wedge the tenons. Clamp the arm and backsplat. Clean up any glue.


Nubby Tenons & Details
When the glue has cured, cut the tenons about 1/8" proud of the arms. Use a scorp to shape the proud tenons into a half-dome shape. Level the legs. The seat tilts about 3° back and the seat height is 16".
For added insurance I pegged the backsplat to the arm with Miller Dowels (Mini X in oak). These pegs are glued in place.
Now it’s “Make Pretty” time. Go over the entire chair looking for flaws or surfaces that could be improved. Break the hard edges. Clean up any little bits of glue.


Finish
I sprayed on two coats of Super Blonde Shellac in a 1-lb. cut, sanding between the coats with a 3M #320-grit sanding sponge. After the second coat of shellac, I used a lint-free rag to rub on a thin coat of Liberon Black Bison Wax in dark oak. Then I buffed off the excess with a huck towel.
This chair is quite delicate, and I like that. But I also know we have some people who want a heartier chair. So my next chair will be the Stout Lad & Lass Chair. Stay tuned.
Very nice. I love that chair. It looks like a comfortable sit. When you drive the arm and sticks to final position, do you use a spacer between the seat and bottom of the curved arm to guarantee uniform height above the seat?
Great looking chair, also love the mahogany, will make one of these one day!